Toilet waterproof construction steps bathroom waterproof do it absolutely foolproof
Most of the people's cleaning work is done in the restroom, so it is the wettest area in the home. If the waterproofing of the wall is not done well, it will lead to water seepage and affect normal life. So what is the toilet waterproofing construction step? The following Xiao Bian will share these issues with you and look forward to helping those who need it.
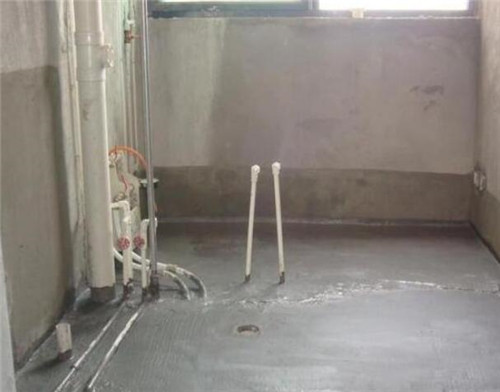
Toilet waterproof construction steps - leveling layer
Some people often pay attention to waterproof construction on the floor when decorating the bathroom, and neglect the waterproof construction of the wall. In fact, waterproofing on the wall is also very important. If you want to do a good job of waterproofing, you must have a thorough understanding of the construction steps. First of all, we first clean the bathroom floor, and use cement mortar to level the ground. Everyone should find a good slope when leveling, point to the floor drain, to ensure that the thickness of the rear waterproof coating uniform.

Toilet waterproof construction steps - brush waterproof coating, clean the surface
After the leveling layer has dried completely, everyone can apply the waterproof layer on it. To ensure the effect, we must brush it twice, apply the first layer of polyurethane waterproof material, and apply it after drying. Etc. (The number of brushing passes is selected according to the brushing thickness designed by oneself, and the brushing thickness: generally 1.1mm, 1.5mm, 2.0mm). After everyone completes the waterproof layer, the coarse sand is brushed before the ground waterproof layer is completely dry. After the waterproof paint on the wall surface, the 2~3mm grain size is not completely dry and is removed. Increase its adhesion to the surface layer.

Toilet waterproof construction steps - make a finish
For the sake of safety, at the end of the day, we must also make a decorative layer on the waterproof layer. The finish layer can be cement mortar or 801 glue, or it can be made directly without facing the tile to make a finish layer. Finally, the joint seam is waterproof. Brush in place. Walls and walls of the bathroom wall joints, the upper and lower water pipes and the ground joints and other corners.

Toilet waterproof construction steps - wall waterproofing
Wall waterproofing and ground waterproofing are performed simultaneously and the steps are similar. Everyone should pay attention to the waterproofing of the bathroom wall: Apply waterproof paint from the ground to the wall about 25 to 30 cm. The waterproof height of the shower area should not be less than 1.8 meters. The area of ​​the water basin should not be less than 1 meter. Other areas Facing the wall 30 cm.
Toilet waterproof construction steps - waterproof experiment
After the waterproof surface of the bathroom wall is completely dry, in order to check the waterproof effect, we also need to do a waterproof experiment. The specific methods are: 1) After the construction of the waterproof layer of the coating film, the first impoundment test shall be carried out. The depth of impoundment must be 20mm higher than the standard ground, 24h shall be no leakage under the floor, and the wall surface shall be tested for 30 minutes. See if the next door seeps. If there is a leakage phenomenon, repair can be performed according to the specific site of leakage, or even complete rework. 2) After the construction of the ground surface, carry out the second pass of the impoundment test. No leakage is finally qualified after 24 hours. (Note: floor drains must be plugged tightly).

The above is Xiaobian on the bathroom waterproof construction steps and bathroom waterproof so do the foolproof related sharing, for everyone to be a reference! If you have more related issues, welcome to continue to pay attention to this site, later will bring more for everyone Wonderful content.
We offer many different type Ignitor Insulator Of Household Electrical Appliances, including dozen of standard design. Besides, customized type can be done per customers' specification and drawing.
These spark plug insulators are commonly made of 95% alumina and shaped by hot pressing. Most of time, the surface finish of glazing is need in order to enhance the insulation breakdown.
We have been dealing with producing ignition ceramic electorde over than 12 years, it help us to make every batch to be dimensional, cosmetic with good consistency.
We support prototyping to mass production. Whatever, it's a sample order or massive order, you are welcome to come with us.
Ignitor Insulator of Household Electrical Appliances
Ignitor Insulator Of Household Electrical Appliances,Ignitor Insulator,Household Ignitor Insulator,Composite Insulator
Jinghui Industry Ltd. , https://www.ceramictek.com